Applications
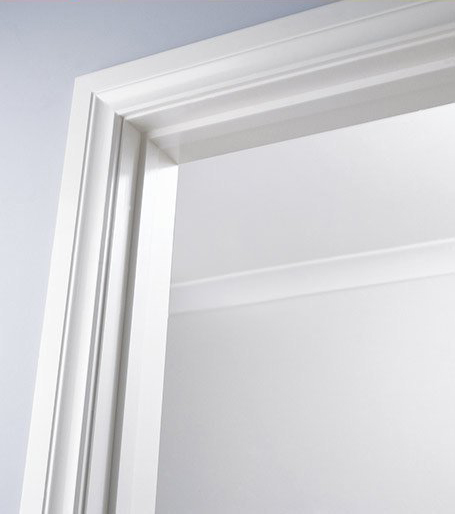
ULTRAprime Mouldings are intended for dry interior use where a paint finish is specified. They should not be used externally or in high-moisture areas around baths, saunas or shower recesses. The moisture content of the moulding should be maintained below 16%. Typical applications are as skirtings, doorjambs and architraves.
Storage
Store ULTRAprime Mouldings flat, under cover on a horizontal pallet or on supports spaced at 600mm maximum centres. Do not store in damp locations or in direct sunlight. It is preferable to leave the mouldings in their wrapped bundles until approximately 48 hours before fixing. They should then be removed and stacked individually so that air circulates freely around them to adjust their moisture content to the site conditions, preferably in the room where they are to be placed.
Cutting and Shaping
ULTRAprime Mouldings are easy to rout and shape with woodworking tools and equipment. Cut mouldings with a fine-toothed handsaw or power saw. Use sharp chisels or gouges to carve moulding ends to scribed shapes. Rebates are easily machined into the mouldings using power routers. Care should be taken when cutting or shaping, to avoid damage to the primed surfaces. Cut ends should be sealed with a primer or a PVA adhesive to minimise moisture uptake.
Installation
ULTRAprime Mouldings can be fixed to lined timber or metal framed assemblies using normal carpentry and joinery techniques. They are also suitable for use over dry-rendered or masonry walls which have been plugged to receive mechanical fixings. Adhesive fixing methods may also be used for decorative, non-structural applications. Seal any cut edges or ends with a solvent- or water-borne primer or PVA adhesive.
Damp Buildings
ULTRAprime Mouldings are a wood-based product and some dimensional movement can occur in response to changes in relative humidity. Mouldings should not be fixed to new cement rendered walls or walls which are permanently or intermittently damp. The cause of moisture must be corrected and the walls allowed to dry before installing.
Moisture Content and Acclimatisation
Like all wood products, Ultraprime Mouldings and Architraves change dimension with changes in moisture content. As moisture content increases, dimensions grow and as moisture content decreases, dimensions shrink. If Ultraprime Mouldings and Architraves are installed with high moisture content, subsequent shrinkage may lead to the appearance of paint cracking or gaps at joints and mitres.
The following guidelines should be followed to avoid or minimise the effects of shrinkage:
- Do not store outside or in damp conditions.
- Do not store directly on floors, especially bare concrete.
- Leave in wrapped bundles until approximately 48 hours before installation
- Unwrap bundles 48 hours before installation and stack individually indoors to allow free circulation of air and adjustment of moisture content.
Wherever possible, acclimatise Ultraprime Mouldings and Architraves in the room where they are to be installed
Ultraprime Mouldings and Architraves are manufactured at lower moisture content than will be experienced in most indoor environments. As such, shrinkage is almost always the result of substandard storage and acclimatisation. The effects of shrinkage can also be minimised during installation by nailing, stapling or gluing to manufacturers recommendations.
Adhesive Fixing
Wallboard or construction-grade, contact-type adhesives can be used to secure pre-primed ULTRAprime Mouldings skirtings and architraves. The adhesives give a fastener-free appearance and eliminate the stopping up of fastener heads. Apply the adhesive in continuous beads along the moulding and approximately 15mm from moulding edges. Bond the moulding to the wall using the contact bond method in accordance with the adhesive manufacturer's recommendations. Adhesive should also be applied to moulding joints, including rebates, scarfs and mitres.
Mechanical Fixing
ULTRAprime Mouldings readily accept nail, staple and screw fixings. As a guide, fastener spacings should not exceed 600mm centres for 18 and 30mm thicknesses and 450mm centres for 12mm-thick mouldings. The use of adhesive in conjunction with the fixings will consolidate joints and is recommended. Cut ends should also be sealed with paint or PVC adhesive to minimise moisture uptake. To avoid splitting, fasteners driven into moulding edges should be kept at least 25mm from moulding ends and corners. For screw fixing, always drill pilot holes to receive the screws.
Fastener Length: Fastener lengths will depend on the nature of the application. For timber frames lined with 10mm plasterboard, typical lengths are 50mm for 18mm thick ULTRAprime Mouldings and 40mm for 12mm thicknesses. The fastener heads should be driven slightly below the moulding surface and not more than 1.5mm deep.
Nails: For normal face-fixing use bullet-head, helical-thread or annular nails, 2.5mm maximum diameter. For fixing to the moulding edges use 2.0mm maximum diameter nails. Drive nails at a slight angle to the plane of the moulding with alternate nails in opposite skew directions. Helical or annular threaded nails give superior nail holding. For pneumatic gun nailing, electro-plated zinc, resin-coated 1. 83mm diameter brads such as Able Cook's DA17 (Senco SFN1 or SFN2B brad guns) are satisfactory.
Staples: Narrow-crown resin-coated staples are preferred for architraves and skirtings; however, wider 10mm crown staples can be used to join ULTRAprime Mouldings doorjamb linings. The staple crowns should be set at approximately 45 degrees to the section when driven into moulding edges. Because of the shear effect of the staple crown during driving, the depth or penetration of the crown should not exceed 1mm.
Screws: Only use light-gauge countersunk head parallel shank (particle board) screws for joining ULTRAprime Mouldings, fixing hinges or fixing mouldings to timber frames.
If screwing into ULTRAprime Mouldings, drill a pilot hole approximately 2mm deeper than the depth or screw penetration. The screws should not be over-tightened.
| Moulding Thickness (mm) |
Typical Screw Gauge |
Pilot Hole Diameter (mm) |
| 12 |
No. 6 (3.5mm) |
2.0 |
| 18 |
No. 8 (4.2mm) |
2.5 |
| 30 |
No. 8 (4.2mm) |
2.5 |
Similar-gauge screws should also be used to fix ULTRAprime Mouldings to metal frames.
For 1.2mm minimum metal frames, use self-drilling, self-embedding head screws with self-breaking cutter nibs, such as WA Deutsher 'Wingteks' screws.
On thinner gauge frames, needle point, self-drilling, countersunk head screws are recommended.
Nailing Architraves to the edge of jambs: Nails should be skewed towards the core of the jamb. Best results are achieved by also gluing the architraves to the jamb.
Mitring
Mitres are used when two pieces of moulding meet at an outside corner, an inside corner (when the moulding is applied flat to the wall), or around doors and windows. First set the mitre box at 45 degrees
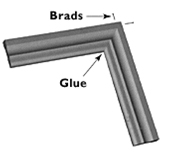
Trim each of the two mitring members at opposite angles. When fitted together they should form a tight right angle. For tight mitre joints, nail and glue joint. Make sure the nails are countersunk below the surface.
Splicing
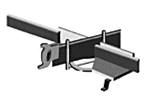
Moulding installation covering large spans may require a splice or a joint. Position the moulding in the mitre box as if the back of the mitre box were the wall. Without changing the angle of the saw, make a 15-degree cut in the ends of both pieces. Position the joint over a solid base such as a stud, top plate or bottom plate. Glue edges, then nail through both mitred cuts.
Coping
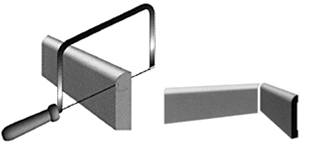
The coping technique is used when butting ceiling mouldings at an inside corner. One piece is cut flat to the wall at a right angle, while the end of the other moulding must be coped, or shaped, to match the profile of the adjoining moulding. Set moulding on wall, upright against back plate.
Trim at 45 degree angle. The resulting cut exposes the profile of the moulding, serving as a template. Following this profile with the coping saw at a 90 degree angle to the face of the moulding results in a duplication of the pattern which fits over the face of the adjoining moulding.
Painting
The light green primer on ULTRAprime Mouldings is uniformly applied and minimises preparatory painting. Paint finishing can usually be achieved with one top coat.
The primer is compatible with water- or solvent-borne decorative paint finishes. Solvent-borne paints provide a harder surface and greater resistance to wear than water-based paints. If unsure about compatibility, trial paint on a small area first. Primed surfaces should be free from dirt, dust and grease.
Set fasteners slightly below the moulding surface and fill with proprietary non-shrinking, fast-dry wood filler such as Polyfilla Mirror Finish. Lightly sandpaper smooth and remove any nibs or blemishes which have occurred during fixing. Apply one full coat of the selected paint to the prepared moulding surface. Always follow the paint manufacturer's recommendations.
For some applications a second top coat might be required by the end customer. Before applying the second top coat, allow the first coat to dry. Lightly sand between coats.
Health & Safety
Ingredients: Reconstituted plantation softwood, formaldehyde-based resin and wax.
Risk: The dust and vapour is irritating to eyes, skin and respiratory system. May cause sensitisation by inhalation (asthma) and by skin contact (dermatitis). Repeated inhalation of wood dust increases the risk of nasal-cavity cancer and may increase the risk of lung fibrosis (scarring).
Safety: Avoid repeated or prolonged contact with skin. Avoid contact with eyes. Avoid breathing dust. Wear suitable clothing, gloves (AS 2161), and eye protection (AS/NZS 1337). If machining without adequate dust extraction, respiratory protection (dust mask) must be worn (AS/NZS 1715 and 1716). Keep work areas clean by wet sweeping and/or vacuuming. Wash work clothes regularly and separately from other clothes.
First Aid: Irrigate eyes with plenty of water. Wash skin with soap and water.
Disposal: Follow above safety instructions, and collect in containers for disposal as trade waste in accordance with local authority guidelines.
Fire: Dust may form an explosive mixture in air. Earth all exhaust equipment and prevent high dust concentrations in confined spaces. Extinguish with water, CO2 foam or dry chemical extinguishers. Storage and work areas should be adequately ventilated. If large quantities of Fast Finish Primed Mouldings are stored in non-ventilated areas, formaldehyde emissions could accumulate to levels which may irritate some people.


